They say the first impression is the last impression. The saying holds true in many aspects of life, from business to personal relationships. And when it comes to displaying your photos or artworks on your walls, the frame you choose can make all the difference.
After all, a picture frame is an integral part of the image you're trying to create. It helps instill a sense of harmony and cohesiveness in your home or office. So, it's important to choose a frame that complements the picture inside it and completes the overall effect you're trying to achieve.
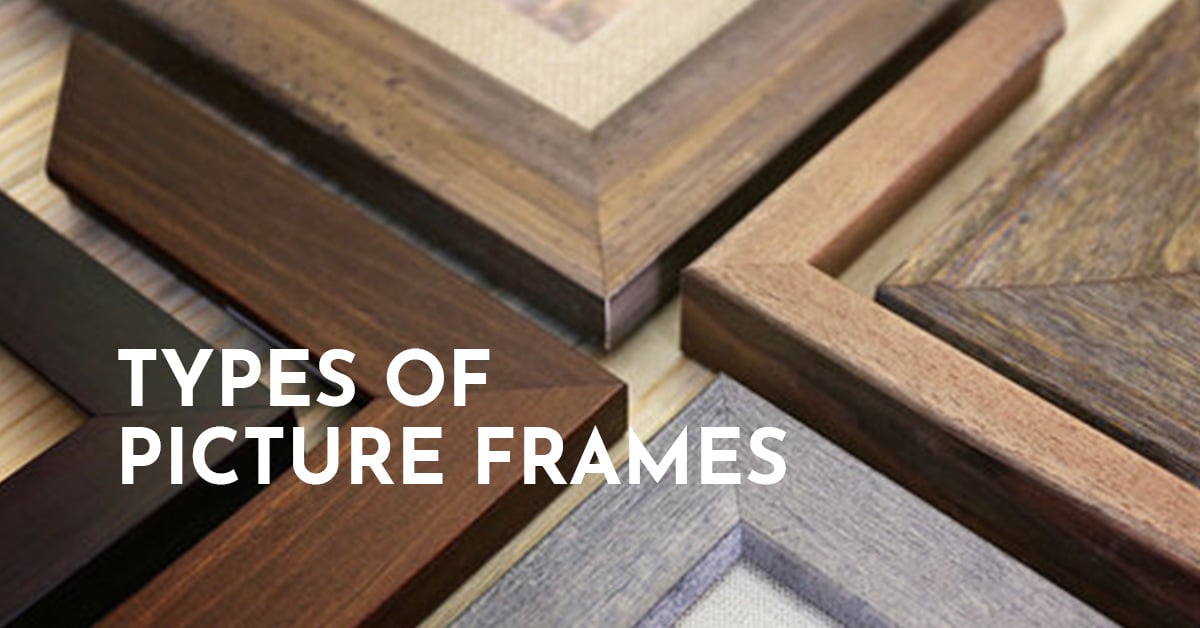
To help you make the right choice, we've put together a comprehensive guide that introduces you to the different types of picture frames and guides you through the process of choosing the right one for your needs.
Standard Frame
Let's begin with the obvious —the standard frame. As the name suggests, this is the most common type of picture frame. It's usually made from a combination of wood and glass and has a simple, classic design that works well with any decor style. The standard frame comes in a variety of sizes—from small (4x6 inches) to large (24x36 inches), but it's the medium-sized frame that makes up the bulk of the market.
The standard frame is a great choice if your main objective is to protect your precious photos and keep them safe from damage. It's also quite versatile—you can use it in any setting, whether it's a home or office environment.
Gallery Frames
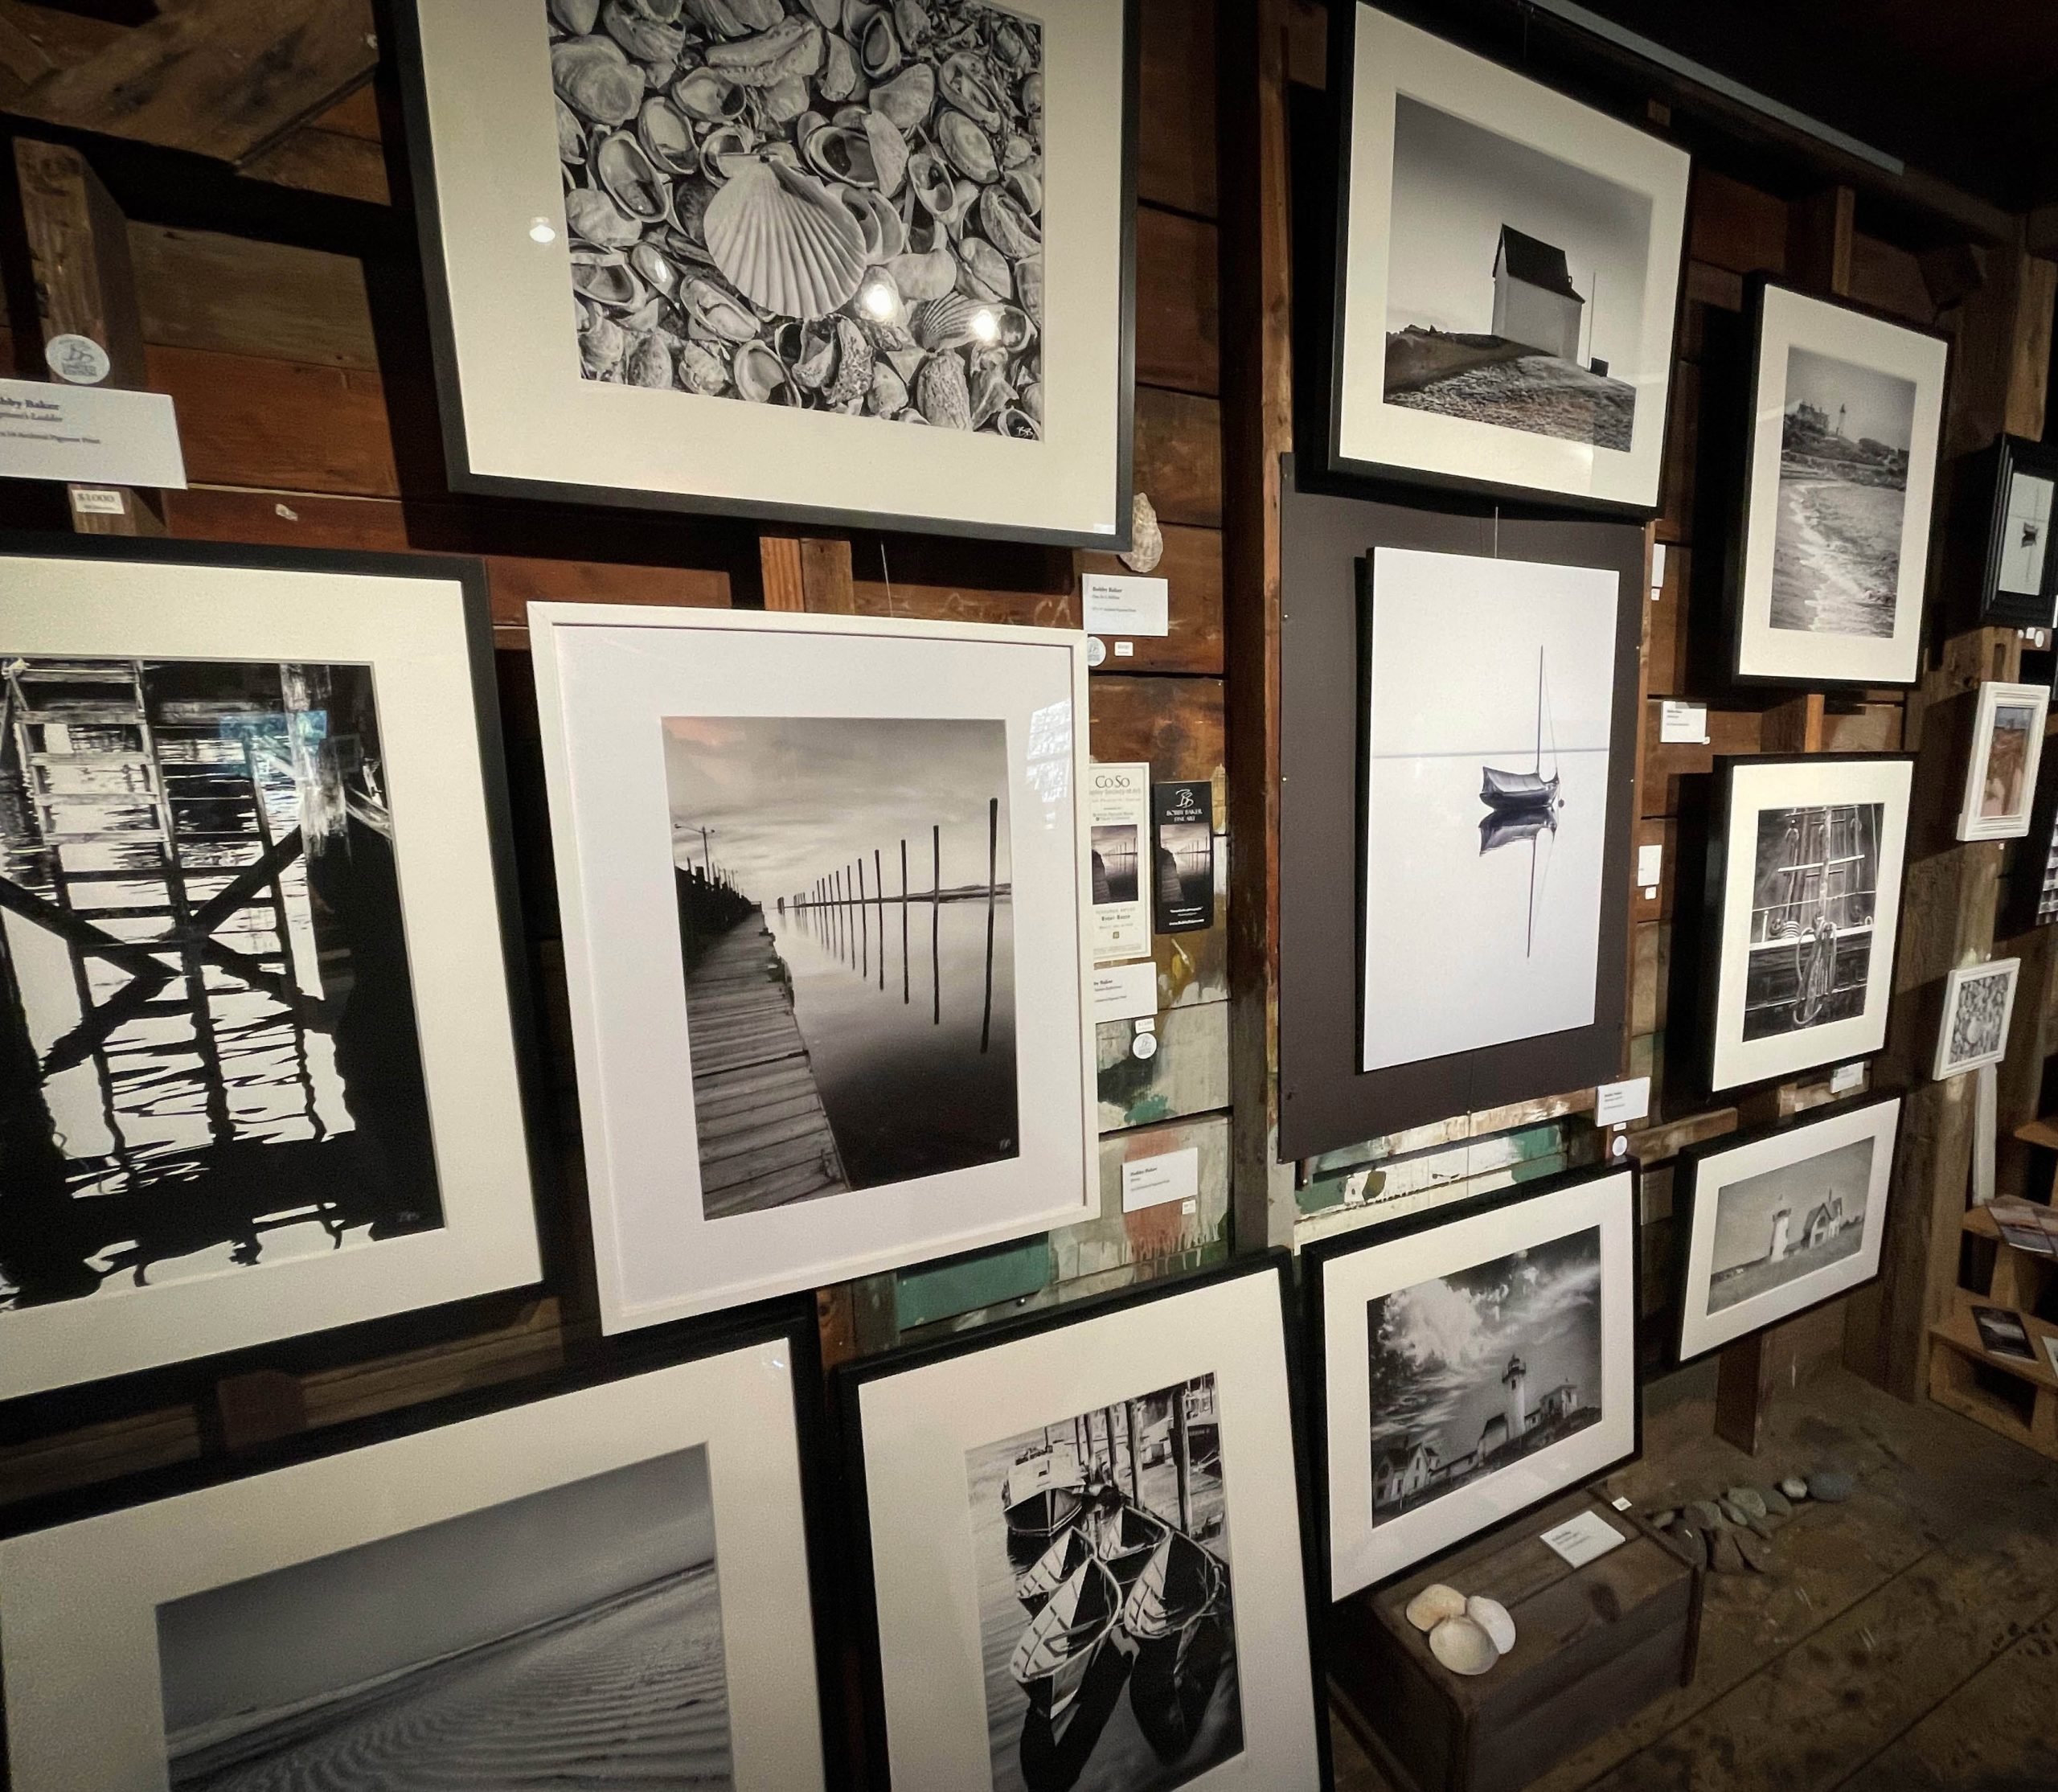
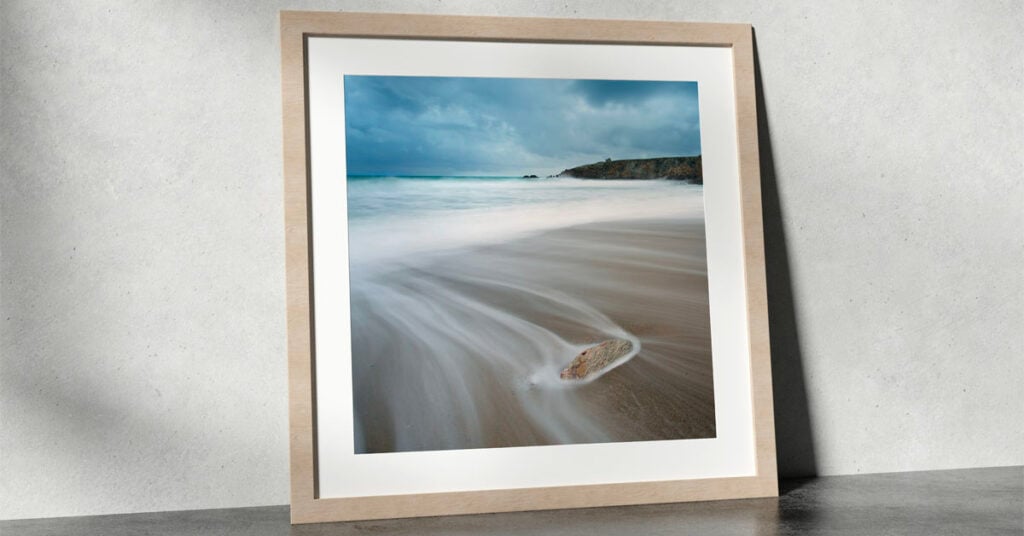
These are a bit more specialized than standard picture frames, but they're still very common. Gallery frames usually feature a very simple design—a rectangular shape with rounded corners and no ornamentation—and they're made from either wood or metal (usually aluminum). The main advantage of this type of frame is that it gives your photos an artistic feel by displaying them on plain white walls.
Now unlike standard frames with standard size, gallery frames come in a variety of different sizes. This means that you can choose the one that best suits your needs—whether it's a large piece of art or a small photo, there's always an option for you to choose from.
Further boasting a rather minimalistic and clean design, gallery frames help draw attention to the art instead of distracting from it. So, if you're looking for a frame that will showcase your work in the best way possible, then a gallery frame is definitely something worth considering.
Floating Frames
Known for their ability to create an optical, floating frame are a great choice for anyone looking to add some visual interest to their space. Featuring an open design without any defined frame to bound the artwork, floating frames help create an open and airy feel that's perfect for rooms where you want to make sure there's plenty of breathing room.
They're also great for displaying large pieces of art or photos so that they can be easily viewed from all angles without detracting from their beauty. With many different styles available, ranging from classic to modern, it's easy to find a floating frame that fits your décor perfectly.
Deep-Set Frames
These frames are also known as inset frames because they're set back into the wall a little bit. They're great for larger pieces of artwork or photos, as they allow you to save space on your walls without sacrificing style. Deep-set frames can be placed anywhere in a room, from above windows to behind beds and couches—almost anywhere where you need something visually appealing but don't want it taking up too much room!
Decorative Frames
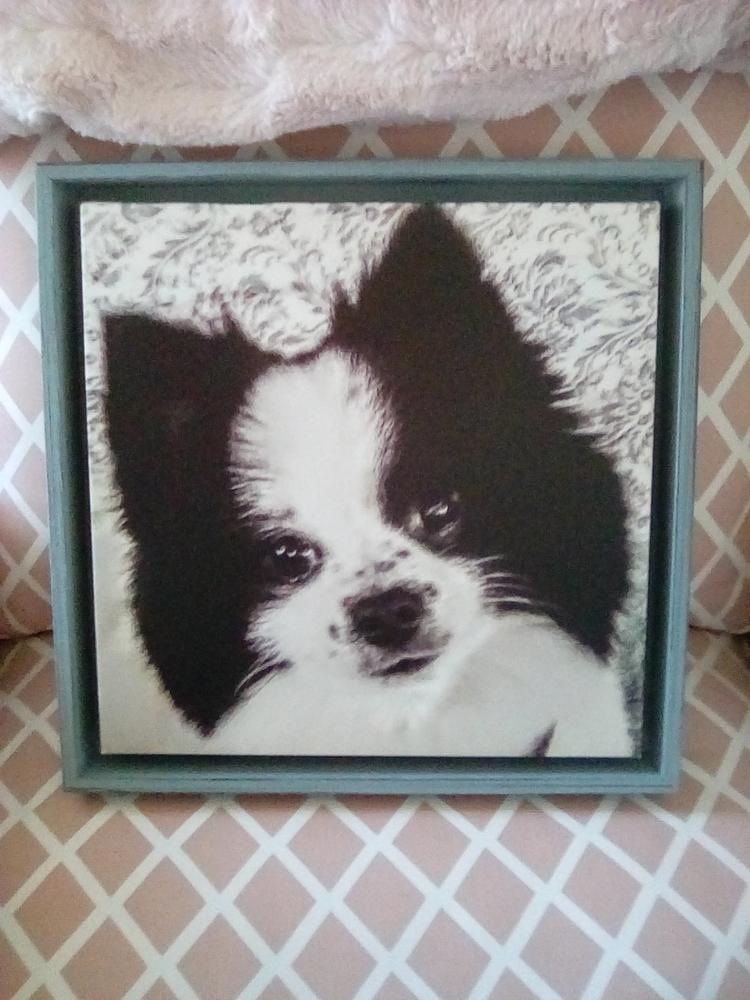
Now, these are the frames you want to use if you're looking for something that's a bit more than just a simple piece of art. Decorative frames come in all kinds of styles, from classic and traditional to modern and contemporary.
Some are even made out of metal or wood, so they can provide an extra touch of elegance to any room in your home. Further engraved with intricate designs or carved with beautiful patterns, decorative frames can be the perfect way to accentuate your favorite piece of artwork or just add some flair to your space.
Collage Frames
A collage is an art form that allows you to combine various images together into one larger picture. The result is a work of art that tells a story and can be used as a way to express your creativity. If you want to create a collage frame for your next project, there are many different types available on the market today. Some come with pre-cut pieces, so all you have to do is place them together in the right order.
Other types come with blank space for you to create your own design. The best thing about making a collage is that it can be as simple or complex as you want it to be, so feel free to let your imagination run wild!
Poster Frames
If you have a poster that you want to frame, there are many different types of frames available. Poster frames come in many different sizes, so it's important to choose one that will fit your artwork perfectly. If you're looking for something simple and elegant, try a black metal frame with a beveled edge.
This type of frame works well for displaying posters that feature portraits or landscapes because it helps highlight the subject matter without distracting from it.
Document Frames
There are some documents that you want to display proudly on your walls, such as a diploma or award. If you're looking for a way to showcase these documents without making them look cheap or tacky, consider using a document frame.
This type of frame is designed specifically for displaying important papers, and it's available in a wide range of styles. If you're not sure what design would work best with your document, ask the salesperson at your local framing store for advice before you make your purchase.
Tabletop Frames
Your tabletop is one of the most visible spaces in your home, so it's important to make a good impression. If you're looking for a way to add some style and flair to this area, try using tabletop frames. These frames come in a variety of styles and sizes, so you can find one that works well with any table or desk.
Often adorned with simple and elegant embellishments, tabletop frames are a great way to showcase your photos, paintings, and other artwork. You can also use tabletop frames to display awards or certificates that mean a lot to you or your family.
Modern Frame
Keep your photos looking crisp and clean by using a modern frame. These frames come in a variety of styles, including simple rounded corners and geometric shapes. Some also feature transparent glass or acrylic so you can see what's inside without having to remove the picture from its frame. Modern frames are perfect for displaying artwork that has an abstract quality, such as paintings done in bold colors and lines that evoke emotion.
How To Know What Size Picture Frame You Need?
When choosing a picture frame, it's important to take into account the size of your picture and how much space you have available on your wall. If you're putting up a small photo or painting, then you can use a smaller frame that won't dominate the room. However, if you want to display an object like a diploma or trophy with its accompanying certificate, then you'll need something larger in order for everything to fit inside.
Beyond the size, the style and material of the frame will also affect how it looks on your wall. If it's the art you're displaying, then you may want to go with a simple black frame in order to let the artwork shine. On the other hand, if you have a family portrait or photo of your kids as infants that you want to display prominently, then it might be better to choose a more ornate frame with lots of detail. In essence, the style of the frame will reflect how you want your object to be viewed by others.
What's The Difference Between a Poster Frame and A Picture Frame?
Poster frames and picture frames are both used to display art, but they serve very different purposes. A poster frame is designed specifically for posters, which are large-format pieces of paper that you can hang on a wall. Poster frames come in various sizes, ranging from extra small all the way up to super extra-large, so you can find the perfect fit for any poster.
Picture frames, on the other hand, are traditionally smaller (though "small" is relative here—they're still quite large!) and are designed to hold a single piece of art. Picture frames are usually made from wood or plastic, and they can be hung on the wall or placed on a shelf.
They come in a variety of colors and styles to suit any taste— you can find them in everything from simple black and white to gaudy gold-plated. You can also get picture frames that have glass inserts, which allow you to display your artwork without having to worry about damaging it.
More Resources
Written by Mark Rogers
 Mark Rogers is the President and Co-Founder of Frame Destination. With over 20 years of experience in the field, Mark has become a leading authority on framing techniques and best practices, and has earned a reputation for his innovative approaches to custom framing and frame services for photographers and artists.
They say the first impression is the last impression. The saying holds true in many aspects of life, from business to personal relationships. And when it comes to displaying your photos or artworks on your walls, the frame you choose can make all the difference. After all, a picture frame is an integral part of […]

From hobbyists to professional photographers and artists, understanding photo print sizes is a key element of every project or piece.
Although seemingly a simple topic, having a good grasp of proper dimensions can aid in avoiding pixelation or distortion, while also making frame choices a breeze.
Similarly, with the right photo print sizes in mind, you may even be able to plan your creations in advance, making sure to get the most out of your hard work.
In this guide, we’ll cover the most important (standard) photo print sizes used for various applications, as well as common aspect ratios and more.
Why Choosing the Right Image Size is So Important
In the realm of photography, photo prints, and print art, size really does matter. Proper sizing will ensure that your works are displayed and visible in a size that best compliments and brings out the best in your art or photos.
Choosing the correct picture sizes may also reduce administrative work such as having to crop out elements of the piece to ‘make it fit’.
What is Aspect Ratio in Regards to Picture Sizes?
Aspect ratio is a term used to describe the ratio of an image’s width to its height. Expressed as ‘X:X’ where ‘X’ is a whole number.
Aspect ratios are not just useful for understanding the size of the photo or image, but also its shape, which is always some variation of a rectangle or square.
For example, aspect ratio of 1:1 means that both the height and the width are equal, resulting in a perfect square. On the other hand, an aspect ratio of, say, 3:2, would result in an image with a larger height as compared to the width, creating a rectangle-shaped image.
Common Aspect Ratios
1:1
This results in a square image where both the width and height are equal in length. A 1:1 ratio is most commonly used for social media profile pictures, thumbnails, and small to medium-sized photos or artwork.
3:2
An aspect ratio of 3:2 is a common size, used often in digital photography and film alike. Interestingly, 3:2 is also the aspect ratio used for 35 mm film.
4:3
Used frequently for various PC monitors, digital cameras, and TVs, 4:3 is often an ideal aspect ratio to use for film or shooting photos or print photography that will also be displayed digitally on screen.
16:9
You’ve likely come across this aspect when watching movies on screen. It is also a common one used with widescreen TVs and computer monitors. Rectangle in shape, this ratio results in a size that’s slightly longer than the 4:3 ratio.
What Are the Standard Photo Sizes Used for Prints?
Photo prints offer the opportunity to transform your digital work or creative art into a print that can be enjoyed by many. But get the sizing wrong, and you could end up losing resolution or end up with certain elements off print due to necessary cropping. This makes it crucial to understand standard picture sizes with ratios.
4 x 6 inches
Arguably the most popular or normal photo size, the 4x6” photo print fits like a glove into a 3:2 aspect ratio, making it perfect for framed greeting cards, postcards, photos, and more. As for pixel length, shoot for 1200 x 1800 pixels for the highest quality resolution.
5 x 7 inches
Measuring slightly larger, the 5x7” is a great size for smaller photo prints and artwork. When using a digital camera to capture images, we suggest a 3.5:2.5 aspect ratio. As for pixels, 1500 x 2100 pixels is typically best.
8 x 10 inches
In the middle of the pack, we have the 8x10” sized photo print. For this size, an aspect ratio of 5:4 on your camera is usually the ideal setting. Although this may result in the need for minor cropping on the sides, it should be minimal. Because of this, you may want to position the art or photo such that there isn’t anything important at the top or bottom of the print to allow room for cropping.
8.5 x 11 inches
Ideal for large print frames or small posters, the best results for an 8.5” x 11” can be had with an aspect ratio of 4:3 and resizing the image to around 3400 x 4400 pixels.
12 x 18 inches
Ideal for larger photographs, pixel sizes of around 3600 x 5400 are ideal, as is an aspect ratio of 3.2 for optimal results.
18 x 24 inches
As we scale up in size, so should your desired image. For best results, aim for 5400 x 7200 pixels and an aspect ratio of 3:4.
24 x 36 inches
This extra-large print is sure to impress. But in order to ensure it is everything it can be, aim for an aspect ratio of 7200x10800 on your camera, and an aspect ratio of 3:2 for best results.
Photo Print Sizes – Not So Complicated After All
Once you’ve familiarized yourself with the common photo sizes used for prints, you’ll have the tools and knowledge to ensure that your own photos and art turn out as good in print as they were in digital.
More Photo FAQs
What are the standard print sizes?
Standard print sizes for photos typically include 4x6 inches, 5x7 inches, 8x10 inches, and 11x14 inches.
What is the standard photo size?
The standard photo size in inches can vary depending on the intended use and industry standards, but a common standard for printed photographs is 4x6 inches.
Written by Mark Rogers
Mark Rogers is the President and Co-Founder of Frame Destination. With over 20 years of experience in the field, Mark has become a leading authority on framing techniques and best practices, and has earned a reputation for his innovative approaches to custom framing and frame services for photographers and artists.
From hobbyists to professional photographers and artists, understanding photo print sizes is a key element of every project or piece. Although seemingly a simple topic, having a good grasp of proper dimensions can aid in avoiding pixelation or distortion, while also making frame choices a breeze. Similarly, with the right photo print sizes in mind, […]
I'm often told that my photographs have a style that makes them distinctly recognizable. When asked how I achieve this, I genuinely fumble for an answer. As is the case in any existential question, I can't point you to one concrete ideal. As we all know, art is subjective. However, I do believe it is possible to develop a personal style that will highlight your unique creativity.
Here's a list of the 6 most effective tips in my experience to help with that.
1. Practice the basics or "rules" of your medium.

As a photographer, I've learned such methodology as the rule of thirds, equivalent exposure, and Ansel Adams' zone system. I like to say I've learned all the rules so I can break all the rules, which to a certain extent is true. Yet, when I frame an image in my viewfinder, my mind is unconsciously dividing that image into nine sectors: the rule of thirds. What's fascinating is that another photographer standing next to me might be doing the same thing. When we compare our images, they are worlds apart. Why? Our creative vision is different.
2. Allow yourself to make horrible art.
I know this is hard for creatives. We all want to be Albrecht Durer right out of the gate. Yet, giving yourself license to make a mess is sometimes enough freedom to break through your insecurities to achieve that next level of art; which leads me to…
3. View the world as a child.
Remember how fearless you were back then because you didn't "know" that you weren't supposed to draw grass purple or hands green. You had a box chock full of crayons, and you were free to use every single color in any way you wished. Permit yourself to be that kid again. Examine and marvel at things close to home. Regain your childlike wonder and put it to good use in your art.
4. Consider applying for artist residencies.
In my own experience, residencies have been the ultimate device for regaining my creative mojo. When researching artist residencies, be specific in your needs. If you are an introvert, you might be overwhelmed by organizations that allow many artists at a time.
5. Sign up for a weekend artist retreat.
If your free time is too limited to commit to a residency, an artist retreat might be a better option. Choose one that dovetails with your personal goals, whether a refresher art course or learning a new method or medium.
6. Don’t forget materials matter.

How you showcase your art and the matting, framing, or glazing you choose is an essential component of an artist's style. Before I found Frame Destination, I was limited to local sourcing and had some early fails with poor quality construction, so from that standpoint, Frame Destination is a life-saver. To be cost-effective, artists must have a place such as Frame Destination that offers a wide selection of framing components. Further, I find it helpful to pick and choose the framing supplies that best highlight my photographs. And, I do have an artistic style I incorporate in my framing.
For my B&W prints, I like FD’s black metal frames. I always use FD’s Acrylite UV Acrylic. It offers archival protection to my work. Plus, many galleries and most public art displays require acrylic now, and for a good reason. I was in a group show where one of the artists had the glass shatter on a massive frame. Luckily, no one was hurt, but that could have been a disaster.
I also like that I can order custom mats from FD. I shoot all my images in raw, and I tend to print in the native size, which isn’t a standard mat size. Plus, I’m old-school and print my images, leaving an intentional white border for signing. I keep my mat specs in my FD account so that it’s easy to order the same mats each time. My default mat choice is an archival board in a shade of white. Acid-free Foam Board anchors my frames.
Most importantly, believe in yourself as an artist. This alone can open new ways of thinking and seeing.
About the Author
Learn more about the author and see more of his work in our Artie’s Eight Artist Spotlight featuring Pamela Z. Daum.
Last Updated April 18, 2022
I’m often told that my photographs have a style that makes them distinctly recognizable. When asked how I achieve this, I genuinely fumble for an answer. As is the case in any existential question, I can’t point you to one concrete ideal. As we all know, art is subjective. However, I do believe it is […]
Observation and curiosity can be a powerful combination. Raj Manickam employs both virtues regularly in the mountains of Colorado, where he captures the beauty of nature and humanity with his camera—“all in good light,” as his website’s URL proclaims.
Image Meets Prose
In the Photo Essays section of his website, Raj reveals the stories behind his images. One that particularly caught our eye here at Frame Destination was “Juniper’s Last Gasp.” The essay chronicles how a dead juniper that Raj had driven past “haunted” him until he returned to photograph it. Two weeks later, he took photos while touring a waste-processing center. The third piece of the puzzle was discovering the “in-camera overlay” function on his Nikon D850. Voila, “Juniper’s Last Gasp” was born.
Photo Meets Frame
“Juniper’s Last Gasp” was part of Colorado’s juried exhibition, Art of the State 2022, earlier this year. Raj tells us that he frames his work using Frame Destination’s Wood Frame Profile 876 in black, Papermat WC-4Ply, and Anti-Reflective Water White Art Glass AR70. “I love the products from Frame Destination working in sync with my art photographs,” Raj says. “They work hand-in-hand for a fine art finish at exhibits.”
See More of Raj’s Work
You can see a wide range of images on Raj’s website, All in Good Light, where along with Photo Essays, you’ll find galleries for Abstract, Art Photography, and Street Photography. There’s also a cool section showcasing his use of ICM, intentional camera movement. If you visit Pueblo, Colorado, between now and May 21, you can catch a show by Photo Pensato, a collective Raj belongs to, at Sangre De Cristo Arts Center. And my Q&A below divulges how Raj got started, his most indispensable tools, and how his Eastern heritage pairs well with 20 years of Western perspective.
Now for Artie’s Eight Q&A with Raj Manickam …
1. What is your background; how did you get started?
For years, I have noticed the kinds of images others might let pass without a second glance. About six years ago, I acquired my first digital camera. I started taking photography classes at the local college to hone my technical skills. Since then, images no longer escape my lens. I capture everything from sudden moments to everyday occurrences and translate them into fine, yet relatable, art. I strive to shine a light on the reality of human experience through composition and honest storytelling. I am using my Eastern culture’s rich language and over two decades of Western point-of-view to draw in my viewers and tell a uniquely framed story. All in good light!
2. How important is it for a photographer to "connect" with their subject?
My photos range in subject from the environment to human interest depiction. These images are often partnered with essays that tell even more of the narratives. I like to discover the engagement between the image and the story. Fundamentals of fine art, abstract, storytelling, and deep awareness emerge in a variety of my images.
3. What has been a formative experience or the best advice you’ve received within your career?
Shoot always and never leave home without my camera.
4. In what ways does your work reflect your personality?
My photography starts with the art of observation. The act of observation comes from paying attention to one’s environment. I’m using that element of the witness consciously. My photos are my voice first. After it leaves my lens and shows up on a screen or paper, it becomes, or may then be, someone else’s voice and interpretation.
5. Creative blocks, do you get them? If so, how do you overcome them?
I carry my cameras most of the time — with me or in my car. With photography, I sometimes plan, and at times, I wander. Often I saunter in the wrong direction. I am drawn to places where I am mostly in quietude, even among people.
6. What is your most indispensable tool? (Not counting the obvious, like paints, brushes, canvas, camera, etc.)
I embrace awareness and observation as an art. And I use CC Express (formerly Adobe Spark) as a creative outlet to write my photo stories.
7. Do you have a new project you are working on, or a new passionate idea?
I’m currently involved in an exhibit with a collective. Several of us are doing a show at Colorado Mountain College Vail Valley at Edwards, Colorado.
8. What "fad" gadget do you most regret purchasing?
An intelligent camera assistant [device that determines camera settings for you].

All artwork and/or photographs used in this post are subject to copyright held by the featured artist.
ARE YOU READY FOR THE SPOTLIGHT? Simply respond to the questionnaire here to apply to be included in an upcoming Artie’s Eight Spotlight.
Last Updated March 23, 2022
Observation and curiosity can be a powerful combination. Raj Manickam employs both virtues regularly in the mountains of Colorado, where he captures the beauty of nature and humanity with his camera—“all in good light,” as his website’s URL proclaims. Image Meets Prose In the Photo Essays section of his website, Raj reveals the stories behind […]
I got my first camera for Christmas at age 12. I took pictures all spring and summer! That summer, I entered 2 photos into the County Fair, and I won Best in Show in the Student Division! I was hooked, and I haven't put my camera down since photographing everything from flowers and gardens to real estate and architecture, landscapes and waterscapes, animals and birds.
Combining a love for outdoor photography with my interior design background, I founded Images Everything Photography almost 20 years ago. A mentor once told me to “look ahead” of your image — meaning, see the entire scene before choosing the composition. I live by that to this day. But this article is not about looking ahead, rather it's about looking back and acknowledging what saved my business through the pandemic when others were losing space in galleries and art shops.
For about eight years now, I have been making photo notecards, as I found that customers really liked buying small art. I needed a way to protect and display my work. Clear Bags were getting glowing reviews from other professionals selling their work, so like them, I started using Frame Destination’s Crystal Clear Bags.

Crystal Clear Bags are perfect for print and photo display and storage. These museum quality bags are acid-free and lignin-free to protect your photographs or artwork during storage and display. The crystal clear transparency doesn't effect viewing, meaning you can keep your art safe even when it's framed and hanging. They also feature a peel-away adhesive strip on the bag - not the flap - so that your artwork will not get stuck to the adhesive when being inserted or removed. They are a great replacement or substitute for shrink-wrapping and are accommodating when I want to protect or ship larger size artwork like matted prints. They are available in over 25 sizes.

During the COVID pandemic these bags literally saved my business. At the time COVID hit, I was selling my work in several different shops. Presto Flowers, in Hopatcong, NJ is one that has been selling my cards since 2015, and the owner, Sam, has a beautiful shop filled with goodies. She and her assistant Chuck are extremely talented florists. In all of the shops, of course, were customers going in and out, day after day. There was some concern that exposed art or decor products would be handled/touched often, possibly spreading the virus or that some products would be removed temporarily from the stores. Having the clear bags on my cards enabled the stores to continue to display and sell them without concern.
Additionally during this time, in some cases, the shops could only set up outside and hold sidewalk sales exposing the products and art to the outdoors, but I felt reassured my work was not in jeopardy of being damaged. The bags offered protection from the outdoor elements like dust flying around. Taking a cue from the shops, during this time, I even sold my work from my own front porch!
Once the pandemic started easing, I participated in a few craft shows again, as I had done for many years. I felt comfortable offering my protected products, and my customers appreciated that they were in the Clear Bags, as well. Thanks to Frame Destination, I’m entering my 18th year of business, even after a rough two years during a global pandemic!
Along with the notecards and matted prints, I enjoy creating home decor and crafts with my photos. The Clear Bags are great for presenting and shipping those items too. I plan to expand soon by offering my art through my own website, but currently it can be purchased online through Fine Art America.
About the Author
Learn more about the author and see more of her work in our Artie’s Eight Artist Spotlight featuring Cheryl Williver.
Last updated February 26, 2022
I got my first camera for Christmas at age 12. I took pictures all spring and summer! That summer, I entered 2 photos into the County Fair, and I won Best in Show in the Student Division! I was hooked, and I haven’t put my camera down since photographing everything from flowers and gardens to […]
Framing artwork is a lot like placing your hand into a glove. Except in this case, your hand is visible while still being sheltered from the elements. Each component in the framing process gives you different levels of protection and affects the longevity of your art.
Using this guide as a reference, you should be able to make informed decisions on the components needed to frame and display your artwork for a variety of different scenarios. Hopefully, you’ll also gain new knowledge and understanding of how to protect and preserve your own artwork — which is part of your legacy as an artist!
Framing art may seem simple on the surface. But it can be tricky. In this blog post, I’ll cover the basic elements of a framing package for works of art on paper or canvas. For those who want to go deeper, along the way I’ll sprinkle in some resources that go into more detail.
Table of Contents:
- Why Frame Your Artwork?
- Components of a Picture Frame
- Dust Covers and Hanging
- Framing Canvas
- 3 Levels of Framing
- Additional Resources
Why Frame Your Artwork?
There are three great reasons to frame art:
1. Display – Frames are the finishing touch for presenting art in an exhibition, a museum, or your home.
2. Protection – Frames safeguard art from damage and deterioration.
3. Aesthetics – The right frame enhances the beauty of the artwork.
Basic Components of a Picture Frame
1. The Frame Itself
Usually wood or metal, the frame is the structure in which a painting, print, or other object is enclosed to improve or enhance its appearance; to isolate it from a wall; to complement a décor; and to support and protect it.
Picture frames come in many different styles and their prices vary depending on the material and frame width/height.
Material – Wood is considered more traditional, while metal can add a contemporary flair.
Style – Gilded, plein air, barn wood, contemporary, rustic, ornate, gallery-style, etc. are just a few of the varieties of styles available.
Cost – In general, wood frames are more expensive than metal frames, wide frames cost more than narrow ones, and ornate frames are pricier than simpler designs.
Bonus Term: Rabbet Height/Depth. Rabbet is a woodworking term that refers the cutout portion on the inside of the frame. To ensure that your glazing, mat, and mount board properly fit inside of the frame, you must know the rabbet depth. If the thickness of your components is greater than the depth, they won’t fit.
2. Glazing
Glazing is the first barrier between the outside environment and your artwork. It protects against heat, moisture, insects, spills, inquisitive human hands, and most importantly — light! Light is artwork’s arch enemy. You can buy glazing with filters and coatings that help reduce ultraviolet (UV) energy and glare from natural and artificial light sources.
Two Types of Glazing:
Glass – Standard picture frame glass is approximately 1/8” thick and comes in regular, UV filter, non-glare, and UV/non-glare.
Acrylic – A lightweight alternative with the look and feel of glass, acrylic for picture framing is approximately 1/10” thick and comes in standard, UV filter, non-glare, and UV/non-glare.
To choose between glass and acrylic, ask yourself these questions:
“Do I want to help preserve it?”
If you do, then choose glass or acrylic with a UV filter to reduce fading.
“What medium of art am I using?”
Pastel and charcoal art are not suited for acrylic because of the static charge. Use glass, always.
"Which glazing is more optically pure?”
Acrylic, Artglass Anti-reflective Water White, and Artglass UV Anti-reflective Water White do not have a green tint like regular glass, so they provide more optically clarity for your artwork.
“Where will it be displayed?”
Condensation is less likely to collect in the frame with acrylic glazing. However, large pieces of acrylic may bow in high humidity.
“What kind of lighting will it be displayed in?”
If the art is a brightly lit room, glazing with a non-glare or anti-reflective coating — available in both glass and acrylic — will allow for a clearer image. But these coatings will reduce sharpness.
“How large is it? Will I be moving it a lot?”
Glass is heavy, so acrylic is a better option for large art, and it’s much less likely to shatter.
3. Mat Board
The mat board is a multi-ply board usually comprising a core, adhesive, facing, and backing paper. It’s available in a variety of thicknesses and colors. Mat boards have a window, also known as the exact mat opening, cut in the center through which the image can be viewed. Mat boards serve two purposes: as a protective barrier between the artwork and the glazing, and as a decorative accent to the artwork.
Bonus Term: Ply. High-quality mat boards are manufactured in various plies, dyed for color, and laminated together. Ply is also an indicator of mat board thickness, for example, 2-ply = 1/32”, 4-ply = 1/16”, 8-ply = 1/8”.
Three Types of Mat Board:
$$$ Cotton Rag Matboard – An acid-free, archival, or museum-quality mat board made with a cotton core and backing.
Regular Cotton Rag has face paper, which can be a color, while the bevel typically remains white. Face paper can become acidic, so some cotton rag mat board face papers are buffered with calcium carbonate to help reduce acidity. The core of regular cotton rag mat board is typically white.
Museum-Quality Cotton Rag has no face paper, and the process through which the cotton is colored keeps it safe for artwork. Because there are no face papers, the core is the same color as the surface.
$$ Alpha Cellulose Matboard – An acid-free mat board composed of alpha-cellulose fibers from wood and other plants like hemp, cotton, or straw. Treated to reduce its acidic compounds, alpha cellulose mat board can be considered archival, though not museum quality. The core is typically white.
$ Wood Pulp (Paper) Matboard – Not an acid-free mat board because it contains lignin, a natural material found in wood. Papermat boards come in a wide variety of colors; however, they are not recommended for long-term preservation of art pieces and should be used as a temporary solution (fewer than five years) if you want to maintain the quality of the image or art. The core is typically cream or white.
Common Questions About Mat Board
“How wide should a mat border be?”
The standard mat border width is 2 to 4 inches. When choosing a border width keep these things in mind: the frame’s lip will cover part of the mat board, and the wider the border, the greater the overall cost of the frame package.
“Color or white mat boards?”
If you are exhibiting an original at a juried show, I suggest sticking with a white or off-white mat. If you are framing artwork for a customer, discuss their budget, color preferences, and style of décor first. Color mats can make a beautiful design statement in a home or office; however, they have to be chosen with care.
“What is bottom-weighting?”
It’s when the bottom border of the mat board is wider than the other three borders. Bottom-weighting is derived from the optical center of an artwork, where a viewer's eye tends to linger. The optical center is slightly above the true geometric center in the rectangular region.
4. Mount Board
The final basic component of a frame package is the mount board, also called mounting board. It’s a rigid, sturdy backing that supports your artwork and keeps it from moving or warping in the frame. It is where artwork is commonly attached. Mount board comes in regular and acid-free, along with different types and thicknesses.
Two Types of Mount Board:
Foam Board is a substrate with a core made of foam — often polystyrene — with a smooth, sometimes paper-based face on either side. It’s the standard backer for framing, and used if the artwork covers it.
Uncut Mat Board is any mat board minus the window opening. Also called “blank” mat board. Used if the artwork is “floated,” which reveals the backing board behind it.
For more information on mount boards, see our article Choose Your Mounting Technique.
Dust Covers and Hanging Hardware
Dust Covers – Also known as frame backing paper, dust covers add a professional touch to your framed art and protect it from dust, air pollutants, and insects. Dust covers can also help keep humidity levels from fluctuating within the frame. Read about how to attach a dust cover.


Hanging Hardware – Framed artwork can be professionally hung with a picture hanging kit, a sawtooth hanging kit, or even Velcro strips. Using a picture hanging kit, however, gives you more flexibility and a lower chance of uneven hanging than brackets because it is wire-based and can easily be adjusted. Frame Destination sells all types of hanging hardware for both wood and metal picture frames.
Framing Works on Canvas and Wood Panels
Canvas is a type of woven fabric on which artists can paint or even print on with specialty printers. There are two ways to purchase them: stretched onto a wooden frame or rolled. Canvases on stretcher bars require another frame to finish the piece: either a standard wood or mental picture frame or a canvas floater frame. Rolled canvas must first be stretched and placed into these wooden stretcher bars before they are framed. Wood panels are available primed and unprimed for various art media. They are an alternate support to canvas, and usually cheaper.
Two Ways to Display Art on Canvas:
Picture Frame – Before purchasing a picture frame for your canvas, make sure the frame’s rabbet is deep enough to accommodate it.
Canvas Floater Frame – This type of frame allows the entire front canvas surface to be visible. Floater frames are cut 1 inch larger than the canvas to allow 1/2 an inch float space between canvas and the inside edge of the frame on either side. Any color applied to the canvas that wraps the sides of the stretcher bars will be somewhat visible in the “float” space.
For more details, see our article titled How to Frame Canvas Prints.


Displaying and Transporting Non-Framed Art For Sale
Framing artwork is expensive, especially if you are framing multiple pieces for an exhibit or gallery show. And not everyone visiting your show will have the budget to afford one of your framed images. However, there is an alternate way to get your artwork in more collectors' hands — sell matted and mounted prints in see-through bags.
Protective Crystal Clear Bags™ are museum quality and ideal for protecting, storing, and showcasing your prints and artwork during storage and display. They feature a peel-away adhesive strip on the bag — not the flap — so that your artwork won’t get stuck to the adhesive when being inserted or removed. They make a great substitute for shrink-wrapping.
Our most commonly sold bag sizes:
• 8 7/16" x 10 1/4“ (8x10)
• 11 7/16" X 14 1/4“ (11x14)
• 12 7/16" x 18 1/4“ (12x18)
• 16 7/16” x 20 1/8” (16x20)
• 18 7/16” x 24 1/4” (18x24)
• 24 7/16” x 36 1/4” (24x36)
Three Levels of Framing: Pros and Cons
$$$ Preservation.
This premium method of framing uses museum-quality materials and procedures that do not alter the condition of the art. It protects art from hazards (including acid and UV light) and is completely reversible. By reversible, we mean that the artwork is mounted in such a way that it can be reframed without sustaining damage.
- Pros – Excellent protection. Museum-level framing is designed to preserve your artwork for many years.
- Cons – High cost, and may require the expertise of a certified framer, depending on the artwork.
- Best for – Priceless and one-of-a-kind works of art, historical documents, irreplaceable heirlooms and photos.
$$ Archival
At this level, we use archival materials or products to reduce the damage to artwork from environmental factors such acid and UV light.
- Pros – Very good protection. DIY framers can create an archival frame package using acid-free components, UV glazing, and reversible mounting methods.
- Cons – Medium/high cost, conflicting information on how long archival materials last.
- Best for – Original artwork and limited-edition prints, important documents, non digitized family photos.
$ Non-Archival.
This economical method of framing uses standard glass or acrylic, non-reversible mounting methods, and/or products where the acid has not been removed.
- Pros – At the lowest cost, DIY framers can use a wide variety of frames, mats, standard glazing, and methods like spray mounting.
- Cons – Artwork may begin to deteriorate within months.
- Best for – Mass produced posters and prints, family photos printed from digital copies, grade school, and community art projects.
Transporting Framed Artwork
How can framed artwork be damaged while transporting it to an exhibit or a client? Let us count the ways. You could drop it on the way to your car, it could knock around inside your vehicle, or you could ding it on a wall, doorway, or elevator. (Ask us how we know!)
We couldn’t find any solutions we loved, so we invented one. Our GalleryPouch™ bubble wrap bags are crafted from a high-quality, heavy-duty bubble wrap. Double lamination surrounds sealed 3/16” air bubbles that are actually smooth, not bumpy, for easy insertion and removal. They’re made to safely and efficiently transport your art.
Where to Go From Here
If you’re an educator or a student, you are welcome to utilize this picture framing components guide for academic purposes. Please cite Joely C. Rogers as the author and add a link to this blog in your resources section.
In addition to the section below, please check out our Framing Glossary, a comprehensive list which contains over 200 framing-related terms and definitions.
Further Resources
Frame Destination’s Blog – Monthly posts on framing, displaying, and selling art.
Expresso Beans Forum – General art discussion forum with a framing section.
PPFA Corner – Professional Picture Framing Association’s framing forum.
Aardenburg Imaging and Archives – Website dedicated to image permanence research focused on prints and photographs.
Last Updated March 1, 2022
Framing artwork is a lot like placing your hand into a glove. Except in this case, your hand is visible while still being sheltered from the elements. Each component in the framing process gives you different levels of protection and affects the longevity of your art. Using this guide as a reference, you should be […]